Restorations part 2, The Chair

OH MY!

I’ve certainly opened a Pandora’s box with this one. Seems every part is damaged in some way. Pieces crumbling in my hand to dust. Sections rotted and riddled with worm holes. Cracks that seem to defy repair in any sensible way. Not sure if I should try and splice in new pieces or just remake entire pieces. Then I’m left with the situation of replicating the finish and age. The wood is so dry, and so black that the refinishers I’m using seem to have little effect at getting back to a decent color. As it sits right now it looks like something left over from a fire. Chunks of blackened wood with parts  and sections missing.

Time to go to my fall back position,,,EXPERIMENT !  I have little to loose by trying alternative means. I’m sure I’ll figure something out. This may take some time.

The starting point.

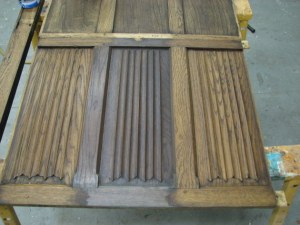
The back panel for the chair which fits between the spiral uprights. Nice crack!

The canopy that will be attached to the spiral uprights supported by the large volutes.

Other pieces that will also make up the back of the chair. The small brackets support the larger volutes.

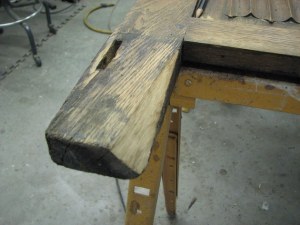
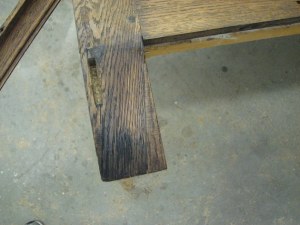
The right arm ,, split and missing a decent size portion.

The spiral uprights. Removing them from the main section was a nightmare. All the fasteners ( nails) were driven in through the outside areas. The wood being so dry and brittle caused many of the pieces to just fall off.

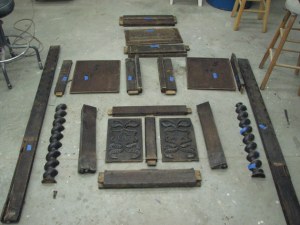
The main body of the chair. There is no turning back now. I’ve got to figure something out.

Parts left after the “fire sale” … sort of what this collection of parts looks like , doesn’t it?


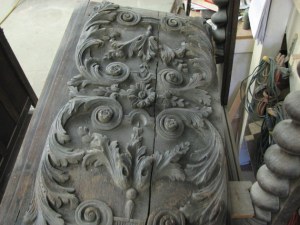
The canopy and volutes


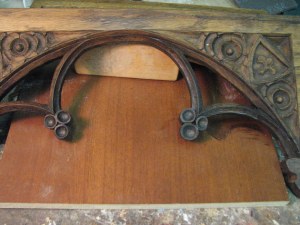
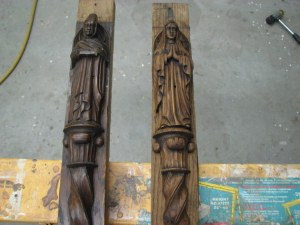
It’s a nicely carved volute, that’s for sure.


Close up of the other panels that make up the back of the chair as well as the small brackets that support the volutes.

Only three words describes this piece,,,,,,    IT’S A MESS !

Me and my bright ideas.

Restorations,6, Finished

I have it finished. Well, I might add another coat of sealer,,but that won’t change how it essentially looks at this point. You can see the results.

I used an oil finish. I also cleaned the iron accent pieces and coated them with a few coats of flat sealer to help prevent oxidation and the damage that can cause. I’ll also have to adjust the color on one of the inserts I made as the oil finish changed the color it had. I just have to make it blend a bit better.

It took me one week to do this job. I’m quite happy with it. Now to see what the client thinks and on to the Presiding Chair.

Restorations, 5, Putting it back together

I’m heading into the home stretch with this piece. I have the piece re-assembled. Now I’m filling the nail holes, sanding to prep for a bit of stain to even out the color  in some areas a bit before I install the remainder of the hardware.

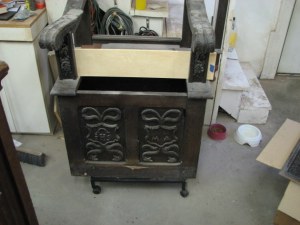
After assembling the face frame separately in order to keep it square I installed the side panels. Then in order to keep the entire box square I made stretchers to keep the entire unit uniform and consistent instead of trying to follow the old markings of where pieces fit as I clamped it together. I knew this might create some fitting problems further down the road but I wanted the piece to be square, sit level and not lean over as it had been had I followed the old assembly sequence.

Another view of the glue up. The pieces on the white cardboard is the other story of the book stand that I just repaired along the way.

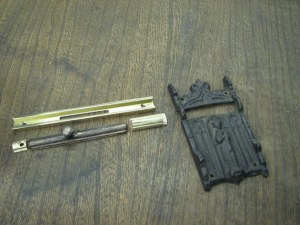
The bolt was missing from the original lock mechanism on the door which meant I had to make up something for it. I bought a new solid brass sliding bolt mechanism needing only the bolt itself. I had to cut it down,( you can see the sections I had to remove) drill a new hole in order to move the handle, solder it into place and since it wasn’t quite thick enough I made a filler piece out of maple to get it to the thickness I needed.

This shows the Maple filler piece I made to fit into the brass bolt to make it thicker.

On the left a cut off piece of the brass bolt with the wood backing. In the center how the brass bolt fit into the slide it came with. On the right my cut down, resoldered and wood backed bolt ready to be put into the lock frame.

The stained wood backing I made for the bolt. This too allows it to slide nicely as well as not having the metal of the bolt scratch the door as it’s operated.

Here I arranged the pieces I removed, the old section where the handle once was as I had to relocate it for my use. I also couldn’t put a smooth polished brass piece into the lock mechanism so I “antiqued” it using my grinders and polishers to make it look like the other metal pieces and then using acid I gave it a patina that matches the other cast pieces as well.

Here it is essentially assembled. As I anticipated none of the large panels ( top, inside floor or the bottom shelf) fit properly as the piece is now true and square. After installing, sanding, fitting removing each panel I’m guessing 20 times or more,, I got them to fit perfectly.

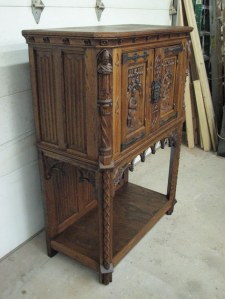
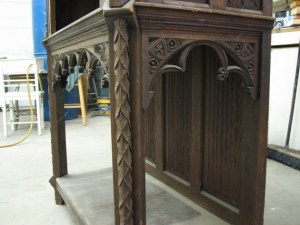
An angle view showing the corner carvings, the legs as well as the linen fold panels on the sides.

The opposite corner. It’s solid as a rock and yet still looks hundreds of years old. As I indicated,, I didn’t want it to look brand new. I think I’ll achieve my objective of an “old,, yet in good condition” piece.

After breaking down the doors, filling the screw holes, reinstalling the hinges ( I had to make some new parts for the hinges as well)  the doors fit nicely into a perfectly square opening without binding or needing much fitting.  The dark areas on the doors was caused by the iron pieces bleeding into the wood. I can’t really eliminate that as it’s well into the surface. Besides , this is something that would have happened naturally over time. Once it’s sealed and the pieces are reinstalled it will look natural.

Up next, the finish itself which will be an oil finish as I don’t want some artificial ( lacquer,poly etc.) finish embalming the surface. That wouldn’t look right.

Bookstand

Just another OOPS! Got a call that this piece needed some attention as well. It’s the book stand from a lectern. Simple repair but the damage went further than what it originally looked like. No matter. Take it apart, fix the crack and put it back together again.

Now back to the Cabinet.

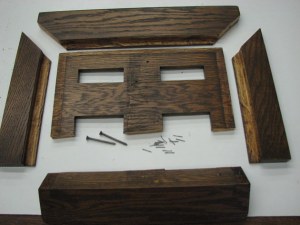
It appeared that this lower piece just needed to be re-attached. But NO,,, the entire frame needed to be taken apart as the corners were split as well.


Blow it apart, clean all the joints and mating surfaces as well as glue the cracked piece back together again,


Getting this piece out with the 14 nails without damaging the rest of the piece was a bit tricky but it worked with a bit of care.

When it’s all back together I’d call it done.


Restorations, 4 …bits and pieces

Here I’m just addressing some damaged areas that need some attention. Moldings that were damaged as well as a section of the back leg. It’s just a matter of getting rid of the damaged area, making some smooth surfaces in solid stock and making pieces to fit. I’ll always try to get the grain oriented correctly as well. It just makes getting them to blend in a bit easier as well as being structurally a bit more sound without having grain running in different directions. The photos tell the story.

Here the corner of this back leg was quite damaged. I cut away all the damaged wood, sanded it flat in preparation for a new piece to be added.

Here the new piece has been added, squared up and sanded to the final shape.

A bit of stain to get it to blend in a bit better. Now I can finish sanding this area, re-staining as necessary as well as “aging” the new wood to get it to look closer to the texture of the surrounding wood.

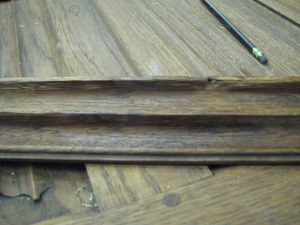
One of many areas of molding that was damaged. Smaller areas as where old nails were inserted will be taken care of with a bit of filler and or sanded to shape. Larger damaged areas such as this need to be removed.

These two shots show pieces fitted into place where it was damaged.  Here too, cut out the damaged area, make slightly oversized replacement pieces to be glued into place . Carve them to shape and sand to the final contour.

Here are a couple of the damaged areas close to being done. I think even at this point they don’t look too bad. Funny thing is that the areas that didn’t look bad by comparison to the original damaged areas, now look bad!  I keep swatting at smaller and smaller gnats as I go on.

Some of these will have to remain as there are other areas on the cabinet that have similar dings. Not all will be repaired so the piece will have an overall unity to it’s look. Again, I’m not looking to have the piece look as if it’s all brand new. Instead the look will be an old piece that has seen some service but is in very nice “original ” type condition. Some wear and tear is to be expected otherwise it’ll look odd.

Restorations 3, Bit of carving

This is such a minor piece but necessary for the total resto. What is nice about many of these old carvings is nothing is ever an exact duplicate. For all the carvings on this cabinet that look like this detail, not one of them is a match to the other. If you look at the opposite panel which also needs the same carving on it, you can see that the arches are totally different in width, arc, and this three element detail isn’t an exact match either. And needless to say, the carving itself isn’t held to any high standard of execution. It appears a rather hasty job of it.

But when it all comes together and you’re not examining each element on it’s own and see it as a whole the entire piece looks uniform and really comes across very well.

Anyway, here is what I did. Simple but fun. Make an outline on paper .Transfer it to a piece of wood following the same grain direction as the original. Band saw it to shape. Rough in the carving then glue it in place. Finish the carving and blend it to the old work. Stain it. When sealed the whole thing should generally disappear.

After being cut out and roughed in, here it’s glued in place and blended to the old work.

As I mentioned here you can see the differences in the carvings and design from the panel I’m working on as compared to the panel from the opposite side. The one from the opposite side has arches that appear twice the width as this panel has.

Even just a bit of stain begins to make it blend a bit more. A little fussing here and there followed with the sealer to give it a uniform sheen and it won’t be all that obvious unless you are looking for it specifically.

And since we’re at it here is the opposite side, same procedure.

Carved, glued and blended into shape.

A bit of stain, adjust the colors and it’s pretty close.

Both left and right panels together. I tend to think they blended quite nicely and shouldn’t appear too obvious when it’s all said and done. Not bad for a couple hours work! Now on to the rest of it.


I’ll just keep adding on little bits that might be interesting as I go along.

Here I repaired the screw holes for the hinges. I could have just squirted some glue into the old hole and drove in a small dowel type piece of wood. Doing that though can create some trouble when you go to drive the screw back in as it will want to drift off center and alter the alignment of the hinge. What I did was to drill a larger hole, make small dowels and glue them into place. Now I can replace the hinge, drill a small pilot hole to locate the screw and have a much more sound solution. A bit more time, but a better job I believe.
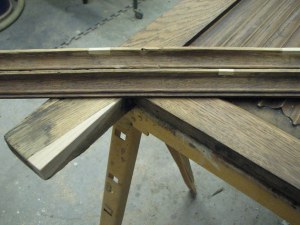
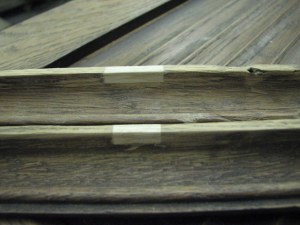


The original screw holes which were quite loose. You can only tighten them so much before they get stripped. That along with the age of the wood, the bit of oxidation from the steel of the screw itself and all the moisture, the holes were just gone.


After drilling out a suitable size hole, making some dowels and gluing them into place I have some solid wood to work with when I go to reinstall the hinges.

Restoration 2, breakdown/repairs

Most of this will be a photo essay. I’ve managed to completely breakdown the piece, clean all the parts and begin the repairs. Many of the tenons are broken and I’ve repaired them with splines where I can. Other smaller pieces will take dowels to strengthen the damaged joint. As you will see all the mortise and tenons are held with wood pins/dowels. Along it’s life in an attempt to secure it a handful of nails were used which have all been carefully removed.

I plan to keep some of the “dirt” in the corners so it doesn’t look like it was just made yesterday. I’m hoping to keep some of the patina of the aged wood and not strip it to like new condition. I want it to end up looking like it is an old, yet cared for piece and as if nothing serious has been done to it. Fortunately the owner feels the same way. He wants it to appear as if it’s still an original piece. It’ll show some age and use but still maintain it’s character.

Check out the photos and if there are any questions I’d be happy to fill in the details. There is just so much going on to cover every topic.

Hope you enjoy this. I certainly am!

Pegs complete the mortise and tenon joints. Knock out the pins and the pieces are free. Along it’s life dozens of nails were driven in to help secure many pieces. Removing them without doing more damage was another story and presented many challenges so as not to dent, tear or splinter the surrounding wood while trying to extract them.

The splits and damaged corner to receive the tenon has been repaired with conventional glues. For the reassembly I plan on using Hyde glues.

Just a detail shot of how the frames are assembled and broken down.

Piles of parts awaiting cleaning.

A succession of photos where before and after cleaning is shown. Oak, given time will turn black. I’m just trying to reverse the process and arrive at a nice warm color which was seen under the hinges and lock plates. Probably close to what it originally looked like.

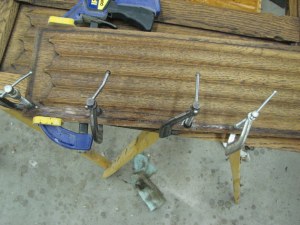
One of the many typical repairs necessary after cleaning and inspection . This linen fold panel , as some of the others ,was especially bad most likely because it is very thin ( (1/4 inch thick) which couldn’t take much abuse. I used traditional glues for this type of repairs as I don’t want it to come apart. From here, I can sand, fill, re-stain a piece to match the surrounding wood prior to applying the finish.

Restorations

Here is another example of some of the work I get involved with. It’ll take relatively little carving as such but interesting just the same.  I don’t believe both pieces were done at the same time but they will make a nice set in a local church.

The chair has taken the most abuse between the two pieces. Ironically I had looked at these pieces about 15 yrs ago and was going to restore them at that time. They were not in that bad of condition. But as fate would have it I never got the pieces, the priest had them stored at another “woodworkers” home who was going to restore them when he could. Turns out he couldn’t do them, or never got around to it, and had them stored in an unheated basement which was located very near a source of water. I think the temperature fluctuations from winter to summer and the high humidity and dampness really took their toll. Now, the pieces are ready to fall apart under their own weight. Just moving them caused them to loosen even more. Parts fell off in transit to my shop. What a shame. But in a way it does make it easier for me to completely disassemble them for a proper restoration.

From what I can tell these ( at least the Sanctuary Cabinet) was made in Belgium in the late 1700’s.  The photos tell most of the story. Currently I have the cabinet completely broken down. I’ll carve and make the missing pieces as needed as well as repairs. Not so much “strip” as deep clean the finish to allow it to keep the patina and aged look of the wood without it looking brand new ( that would be a crime) and reassemble them.

Should prove interesting.

An overall shot of the Sanctuary Cabinet . The missing doors are laying on top of the cabinet.

One of the corner carvings. I had started to remove the moldings prior to photographing it.

The other corner carving.

The open base with some beautiful carvings here as well. The corner legs as well as the Linen Fold panels along the back. These also appear on the sides of the upper cabinet as well.

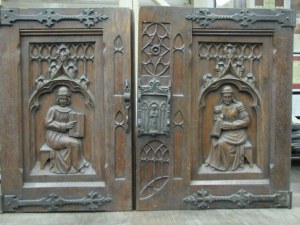
And the doors which were missing from the first photo.

On to the chair. It should have a seat that is hinged allowing access to the base. There is also a foot rest which should be along the lower edge of the face of this chair. The entire upper back is out at this point which will be seen in following photos. For now just the spiral uprights remain.

This is what is left of the upper back of the chair. Between these spiral uprights will be the large carved panel you’ll see next as well as a canopy with large volutes supporting it . They ( volutes) will be attached to these spiral uprights.

An overall look at how the back panel, corbels and canopy will be arranged as the back of the chair. The spiral uprights support this panel as the chair back as well as the canopy itself.

A closer view of the corbels, canopy and cracked back panel.

And a close up of one of the corbels.

Some assorted other pieces for the chair. Some wonderful carvings in this piece, as well as the Cabinet.

And one of the arms of the chair in need of some attention.

I’ll post updates as I move through the restorations. Time isn’t a factor here so I can work this in between jobs. Though I most likely will continue on them straight through. Hopefully that will allow me to remember how they go back together!