This is the follow up and last installment of the prior post , Fix some Cracks…
Here I’ll do a quick recap showing the body and then continue on with the last items to be made for the Crucifix.
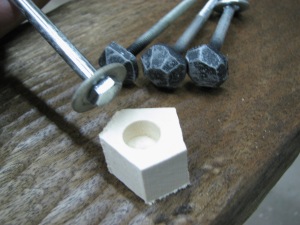
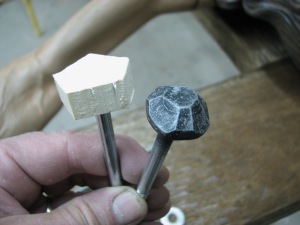
I had to make the nails for the hands and feet. Being that there were some rather large holes there I decided to use hex head bolts, counter sink the heads into a piece of wood and epoxy the bolt and a washer to the underside of the piece of wood. My reasoning is the washer will take any load better than a glued piece of wood, even though these aren’t holding the body to the Cross.
I didn’t show the process of making the Cross but it’s made from Mahogany. I used two boards 1″ thick X 7″ wide for the face. To make it appear as if it’s a thicker timber I added 1″ X 1″ strips around the perimiter to make it appear as if it’s solid. Once done I carved the ends to look like old weathered timber showing the end grain and for texture gouged the surface.
The scroll was made from one piece and the idea is to look like a scroll of paper. I think curled up like this looks better than just a flat , painted panel.
The painting on the piece drove me nuts! I wanted to achieve a look that didn’t appear as one solid color and have it look new. I also didn’t want a true flesh color. I wanted to have some old layers of paint in the nooks and crannies to indicate age. And , I wanted to see some wood and grain show through. It doesn’t read as well in the photos but it works .
OK,, that’s where I was.
Here are the bolts and some shots of how they went together.
Now for the scroll. It’s Basswood, painted in primer here.
Now on to the rest of it. Photos I think at this point is all that’s really needed.
Hope you enjoyed it and found something useful.


recent comments