I was asked to bid this job as well as provide some samples of the completed mouldings. These pieces are in Mahogany and the total job will require 590 ft. of each piece of trim. The larger one is 9/16th inch wide and the smaller one is 3/8ths inch wide. Not very wide as moulding goes but these will serve as trim for custom made Mahogany doors where the moulding will fit into panels in the doors.
In order to carve pieces like this I needed some way to hold them securely without damaging the pieces and have full access to them when in the process of carving. Also I wanted a jig of some sort to hold either piece. I came up with this idea of a vise that would accomplish everything I wanted. It had to be quick to open and close. Hold the pieces securely. Not interfere with the carving nor damage the finished carving in any way since they are so small and delicate.
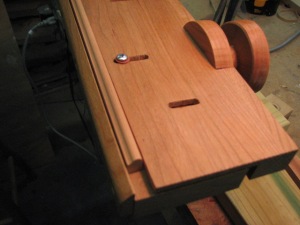
I used some Cherry stock and made a bed. Along the face I added a fence if you will to act as a stop for the moulding to sit against. What holds the moulding in place is a sliding table that presses against the back of the moulding effectively pushing it against the fence. A pair of wheels along the back exert the force against the sliding table.
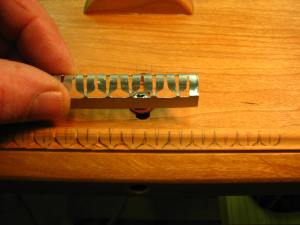
In the bed I inserted a pair of threaded rods. I made the wheels out of two pieces into which one piece I inlaid a square nut before gluing the pieces together. With a hole passing through the wheels I basically capture the nut inside which made essentially a large nut that when threaded on to the rod and tightened it gives the force against the sliding table to tighten it against the moulding. Sounds odd but the photos will show it clearly ( I hope )
Also for doing repetitive pieces as this moulding is it’s necessary to have a pattern of some sort to rapidly and consistently draw the pattern. For the lengths needed here or in cases where many repeats are necessary of a design using paper and tracing just doesn’t work at all. I made these templates for each strip of moulding out of thin sheets of aluminum bent to the shape of the moulding. Many times I’ll use chisels to cut them out once the pattern is on the aluminum but in this case since the designs are so small I used a burr to cut out the templates.
If the template needed will be used on flat pieces instead of moulding for example, I often use the plastic “For Sale” signs. It’s easy to work and holds up well for repeated use.
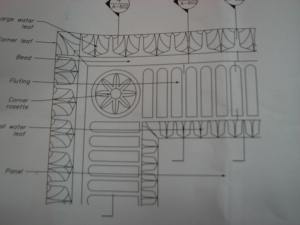
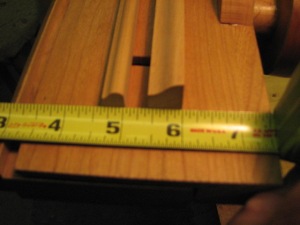
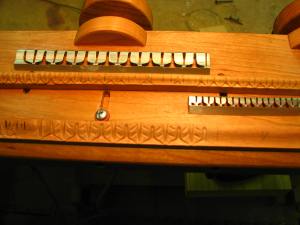
This is the door moulding that will fit into inset panels in the Mahogany doors. The larger outside moulding is approx. 9/16 and the inner piece is 3/8. I don’t have to make the section with the flutes or the rosette corner block.
Here is the broken down carving vise I made to hold the mouldings.
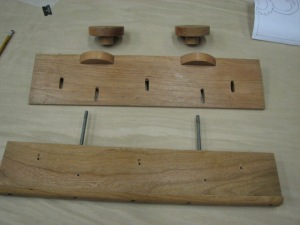
On the bottom you can see the bed with the pair of threaded rods inserted into it. Along the front of this bed is a flange that the moulding will sit against. The upper piece is the sliding table that will press against the moulding. And the wheels with the capture nut inside act as large nuts to provide the force against the sliding table.
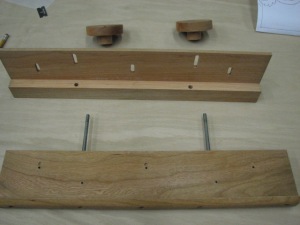
Here you can see the table tilted up where the threaded rods pass through it. The slots in the table are for screws that will keep the table snug against the bed as the screws aren’t tightened securely but just enough to keep the table against the bed.
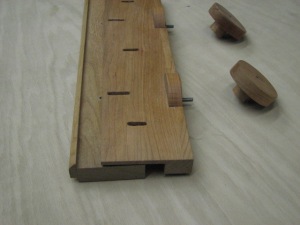
The side view might clear things up a bit as you can see how the two pieces now fit together with the small trough along the front is where the moulding will be inserted and clamped in place once the wheels are spun on the threaded rod.
\
The smaller piece of moulding has been put in place and by turning the wheels gets clamped tightly in place.
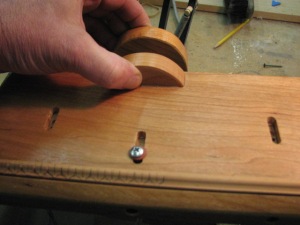
These small pieces of wood act as thumb catches to allow me to slide the table to release the mouldings. The screws aren’t put in tightly as they merely act to keep the table from lifting from the bed. Since it’s a bit snug the thumb pulls come in handy after releasing the tension from the wheels and sliding the table back a bit.

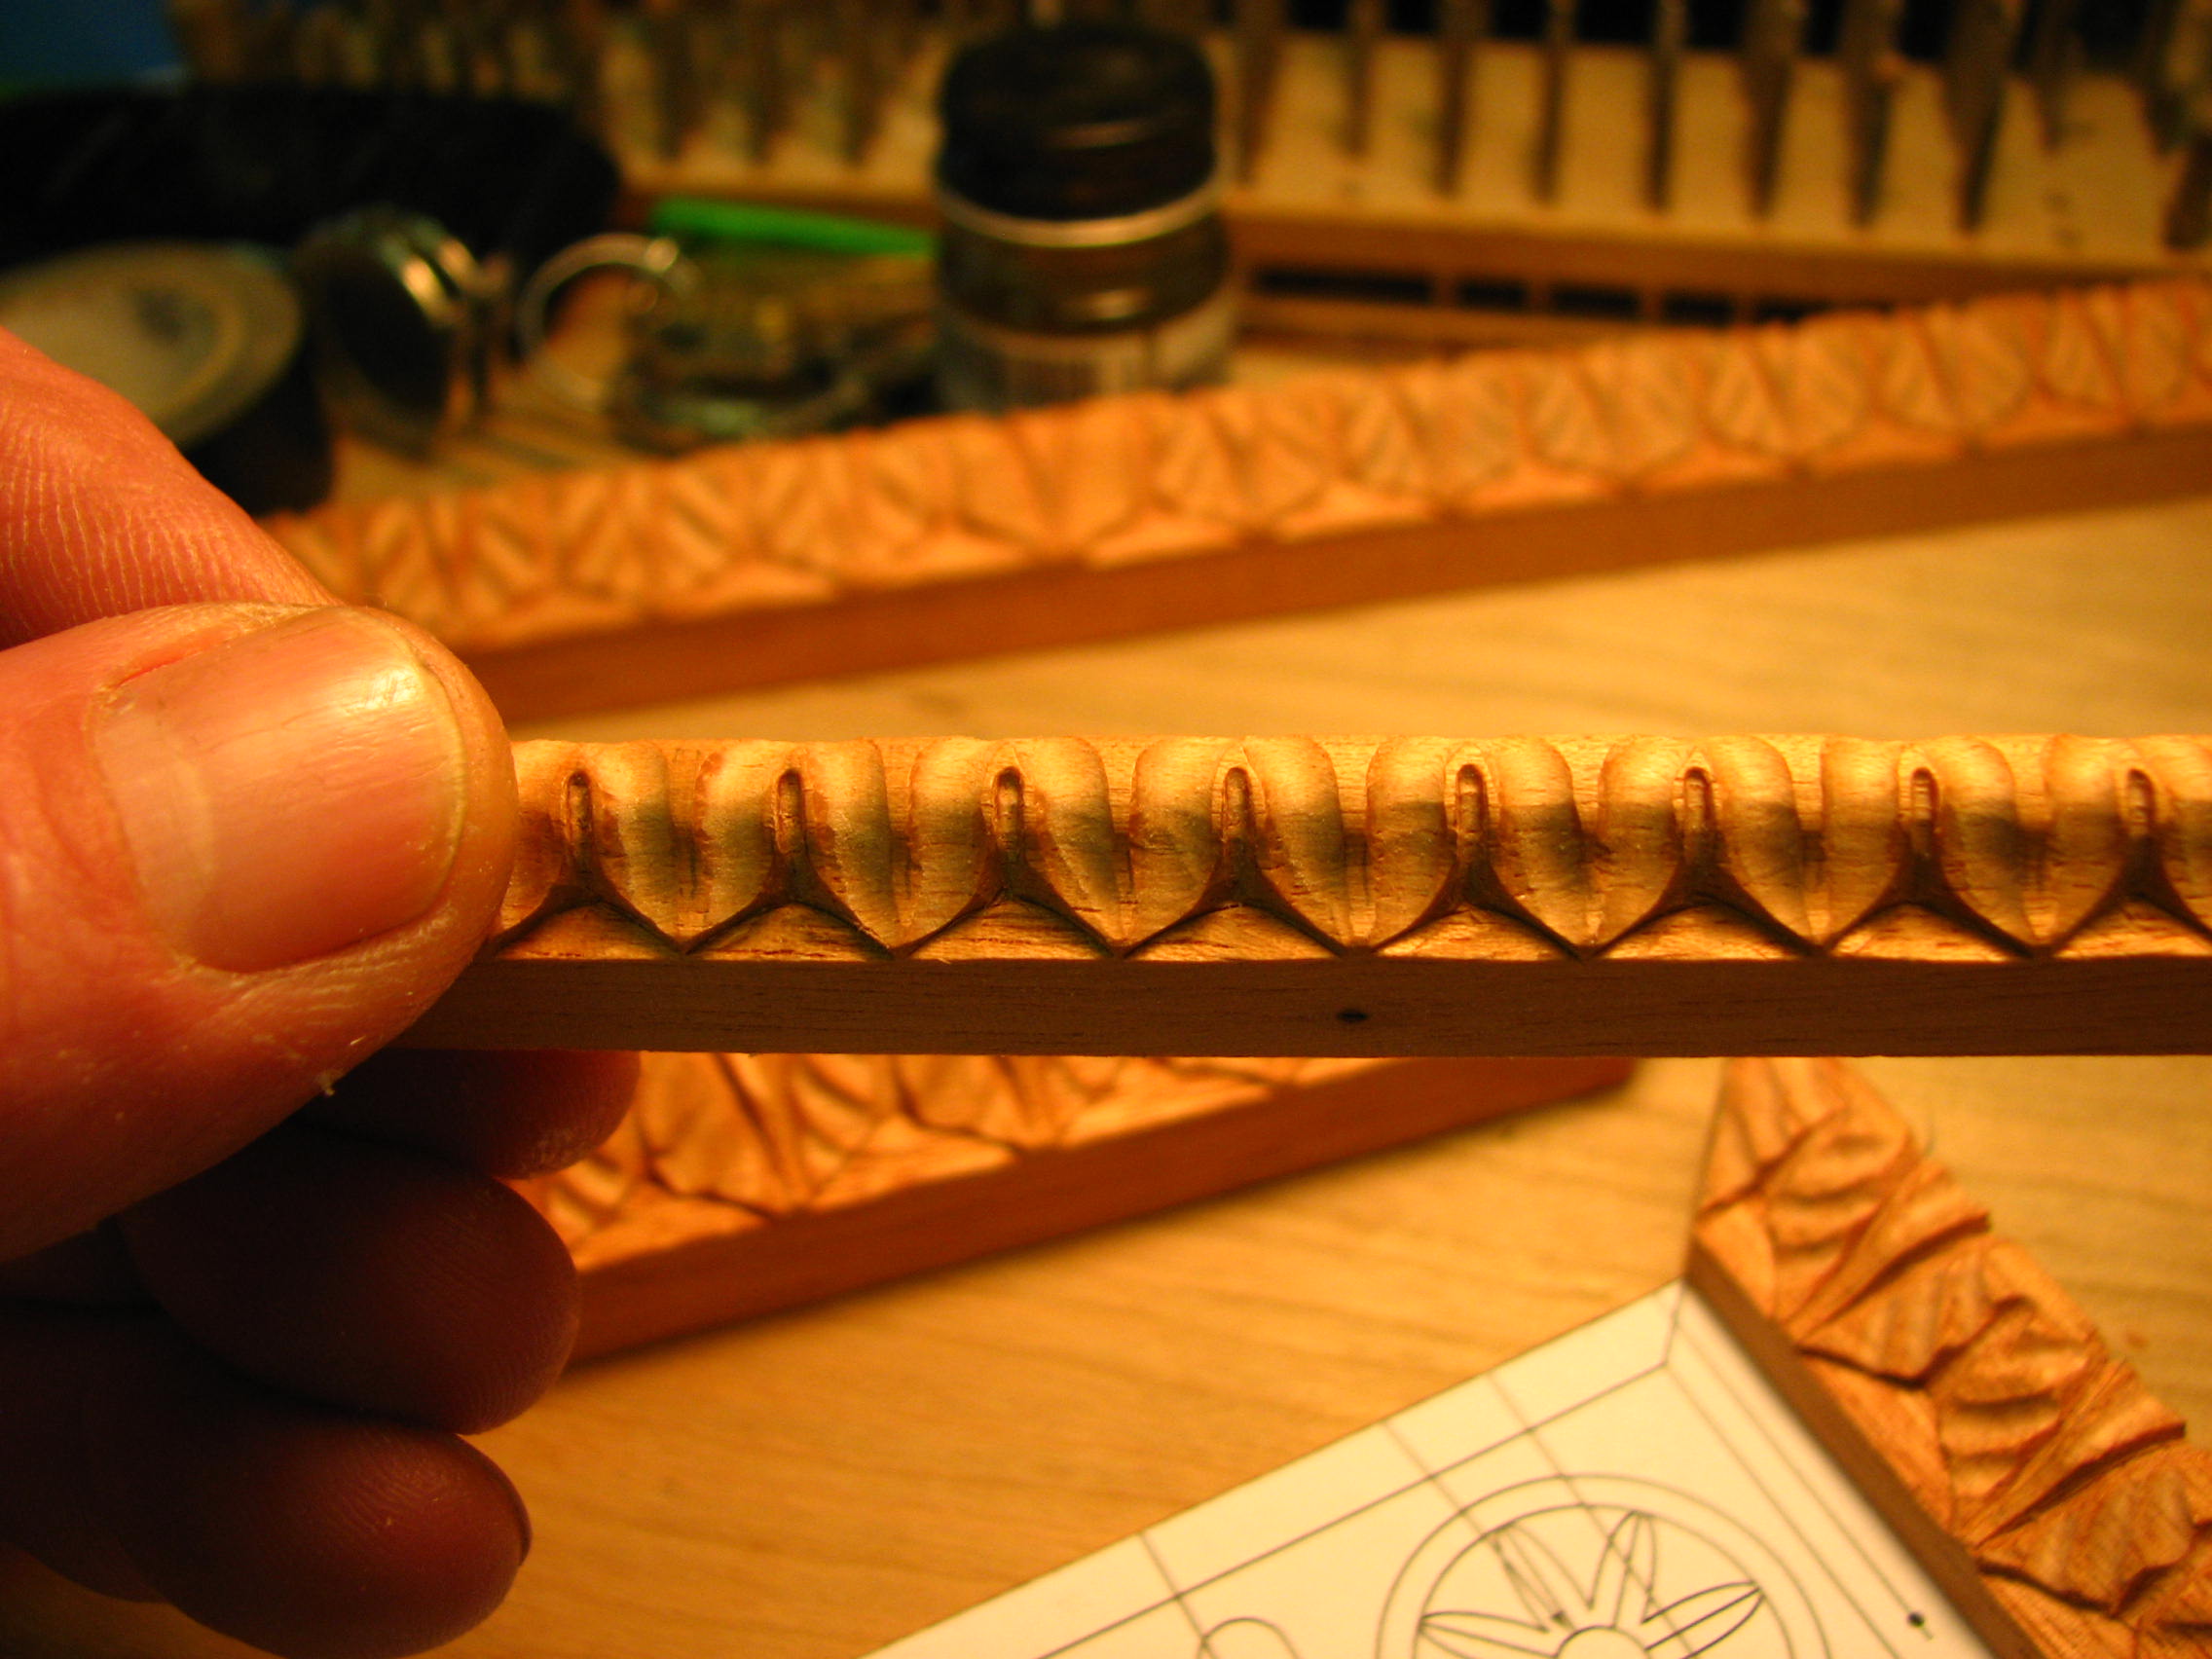
The aluminum template for the smaller piece of moulding. All totaled there will be approximately 22,000 of these small leaves that will need to be carved .
Slightly blurred but you can see the size of the mouldings and how small the actual carving will be.
The template for the larger moulding is show here along with how the template can easily transfer the design to the strips of wood.
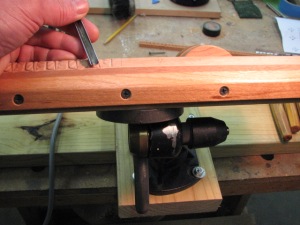
I mounted the vise to a swivel base so I can tilt it to the ideal carving angle. Doing 1180 ft of moulding comfort , ease of accessability and speed are very important. Here you can also see that there are no obstructions to get in the way of carving.

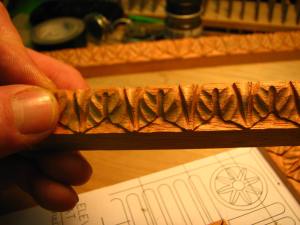
A close up of each of the mouldings and you can see that the large (?) leaf design is about the size of my thumbnail!
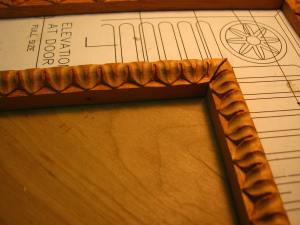

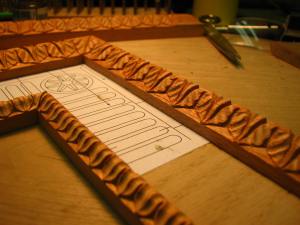
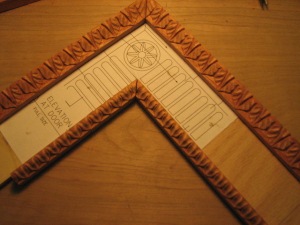
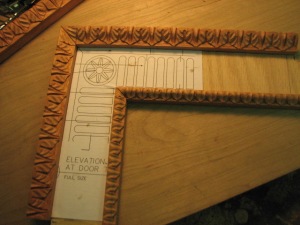
Various angles of the sample I carved. I used a cut out of the design they sent to fill in in between the two pieces of moulding just to get an idea of what it will look like.
Another thing to consider is that the runs will not all be equal so the design has to be adjusted over its length to allow for miters and variations in length and still have each corner end up looking perfect and have all the spacings the same.


recent comments