Carved Applique Restoration

Here is a piece that just came in. It’s for a piece of furniture that a local company is refinishing. They send me pieces from time to time that need repair, duplication or in this case just splice in some wood and complete the carving. I originally wanted to re-carve the pieces but they felt they would have no problem matching the stain and having the repair disappear. Besides , it saved them some money I don’t think they budgeted for.

The photos and brief description tell the story.

Here are the two pieces in need of repair. The overall piece is approx. 11″ X 3 1/2″ X 1/4 inch. As you can see the bottom of the pieces have been knocked off. I started by making a pattern  using the top edge of the piece for reference. As these are mirror images the one pattern worked for both. I simply placed a piece of card stock under the carving lining it up with the top edge for reference and just drew what I thought the missing piece looked like.

Once I had my pattern I then went to the table saw and cut away the remaining damaged sections on each piece getting back to solid wood where there was no damage. One would pass into the saw with no problem using the top edge as a guide. The other had to be placed over the saw with the blade down and then gradually brought up to cut through the piece as the top edge and location of the broken piece wouldn’t allow me to make a conventional pass through the saw. Then a simple matter of completing the cut using my band saw.

Once the cut was made I used my pattern to determine just how big , and what shape the repair piece needed to be. I cut the repair piece out of a matching ( grain wise) mahogany that was cut to the thickest dimension of the applique. Once the piece fit perfectly I glued and clamped it into position. The sections I glued in were approx. 3 1/2 ” long, and one was 2 1/4″ and the other 3 1/4″ wide

Here is the right side piece with the new wood glued in place. I then drew the design on the wood and followed with my router on this piece to remove the deepest part of the design to match the depth of the rest of the carving. Then with my chisels carved the rest of the design following the contours of the original. Pretty simple as carving goes as it was primarily bevels . Then a quick sand with some 220 blended it perfectly with the original piece.

The resulting carving on the new section matches just fine with the old section.  I always have to restrain myself doing pieces like this as I’d do the accent lines differently but in cases like this I have to remember to try and match the “hand” of the original carver and the style of their carving.

The left side didn’t require me to use the router as the splice didn’t extend into the deeper area of the carving. This, with the Mahogany , was a few quick passes with a #2 wide chisel to essentially complete what was needed in the way of carving. The small area inside the curve was a #5 to create a bit of a curve then finish it off with a few passes of the #15 to complete the small lines.   Generally before doing the small lines such as the ones here, you have to sand the piece to it’s final shape and then add the lines. Otherwise you’ll just sand away some of the crispness of the lines and have to do them over.

Well that’s the job. Now call the client and have them pick them up.  Hope you found something useful here. Things like this are a welcome break from the norm, are fun and a bit interesting to do, and it still adds something  to the cash flow.

Thanks,

Mark

Shaving Bowl and Stand

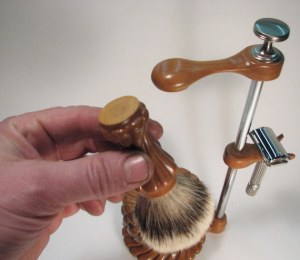
I made this piece some time ago when I got interested in using as well as restoring vintage razors, both double edge as well as straight razors.

The reason I’m posting it now is because I just made a razor to match the set.

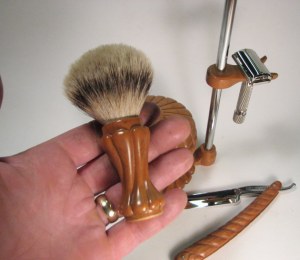
It’s made from Cherry, the same as the rest of the pieces. The blade was in fair condition, but I restored that to a mirror finish after fixing several issues with it and modifying the shape a bit. For these handles which will be exposed to water I use CA as a finish to stabilize the wood.

The blade as you can see has a bit of wear to it along with the rust. I addressed both issues.


The blade is leaning against my chisel, but you can see by the reflection the rust and pitted finish is now gone.


I roughed out then sanded the basic shape of the handle, then drew the design on it and carved it using a V tool as well as some 2’s and 3’s. The one side is nearly finished as some sanding has been done and the other still shows the chisel marks.


The finished razor and the set it now goes with.


The brush is held in place with hidden magnets and it is filled with a Silvertip Badger knot.


Oak Church Carving

I had posted this job a while ago and have now wrapped it up. It required 4 capitals, 6 large and 4 smaller Fleu de Lis’ ,a Cross and 72 Crockets for the Spires. This was the first time working for this company who is doing the primary woodwork, finishing and installation.

Now I don’t imagine they have much background making up pieces for woodcarving considering the blocks they prepped for me. Let alone the time frame they gave me. Initially  I was to have 3 months for this project giving me more than enough time. As it turned out I didn’t hear from them for some time as they indicated there were details to work out with their client. Fine. Then one day out of the blue without warning the called and said how soon can you pick up the pieces and start carving.  “We need this done within 1 1/2 months” . Great! Did they ever consider I had other work in the shop with their own deadlines that I had to complete first while I was waiting for them to get their act in gear? And then after a couple of weeks into the project they called and asked if they could pick up the pieces. And,,,my time frame just got shorter. Rather than the end of the month,, they needed the rest of the pieces a week to two weeks earlier for final fitting, staining etc. as they now moved the installation up a bit.  It’s always the carver that gets the short end of the stick, but I got it done with a day to spare. Sure,, after giving up sleep and going from 9 AM to 2 Am almost daily.

The blocks as I mentioned. Why glue up massive blocks such as the capitals (12 inch square X 11 high) when most all of it needs to be removed?  The Fleur de lis ,,6 inch blocks. And they needed to be 2 inches X 5 inches.  The cross, the main members are 2 1/2 inches square with blocks at the end for the ball shapes. They prepped a massive cross using 4 inch blocks. Why? Make up a cross out of 2 1/2 inch stock ,, and add blocks for the ball shapes. And don’t glue it all together as they did the original piece. They were supposed to call me when it came time for carving blocks,, but that never happened. So I made them redo the cross at least while I was there.

Anyway,,, here is the project,

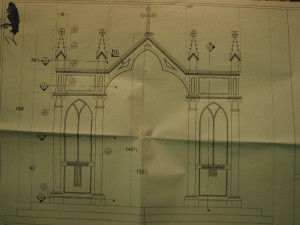
This is the main part of the Altar. There are also two side altars that are niches for statuary that look like the arched area in this shot.


The blocks they prepped for the capitals.


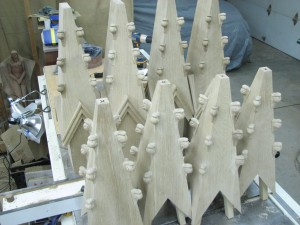
The spires which will receive the Crockets in the small flats along the edges.


The box of 72 – 1″ X 1″ X 2 1/2 ” blocks for the Crockets.

The other pieces were just simple blocks for the Fleur de Lis, but here you can see how I started to prep the blocks for the capitals. I used my table saw to cut lines ( after determining the profile) along each side of the block. I started where the large curls would be to establish a given line. I then kept moving down the block, cutting depth lines to the profile I had determined and then using a large chisel from the bottom up, I just pounded off each layer of wood. After getting a square profile I used some power to round everything off.

Unfortunately I was so wrapped up in this and pressed for time that I don’t have shots of actually carving the blocks. But using templates I was able to locate each element, use more power to rough everything into basic locations and then carve it all with my chisels to the final shape. Templates for this work is very important as you need to have everything on each side of the capital look the same as well as from piece to piece. Without them there would be too much room for error.


Here are some of the templates I made. On the left is the profile for the capital. To it’s left is the template to lay out the patterns for the leaf design as this had to be repeated 6 times on each capital. Next to that is the template for the Fleur de Lis. Above that is the template for the small leaf design that fits between the large curls that extend from each corner of the capital.

And a finished capital. I also made templates to define the outlines of the leaves and how the ‘V’ section for the middle area gets defined.


The finished ( some sanding of course) capitals.


Nothing dramatic here. Transfer the design from the pattern to the wood, band saw it , carve it.

The finished Fleur de Lis.

The finished cross sitting on the cap’s.

For the Crockets I made these profiles, top and side, to allow me to band saw them first

Here I band sawed the top and side profiles on each of the 72 crockets. That’s 15 cuts for each keeping the parts in place with an incomplete cut to facilitate cutting from different sides, then 5 cuts to release all the parts. That’s over 1400 band saw cuts just to get them roughed out. One,, two,,, that leaves 1398 more to go,,,,I must be nuts.


Once the pieces were cut on the band saw, I made this frame/jig to hold them so I could use my duplicator to further rough them out. I carved a model in some scrap wood ( NOT OAK!) , hardened it with CA and used that to start the process. I also made indexes to locate each block in exactly the same spot by using the table saw to make a channel for the blocks to sit in and then only had to locate a hole in each one in the exact same spot using a jig on my drill press so they located the same on each and every piece. Now the duplicator was only able to cut one side at a time. So after doing all the pieces on one side, I was able to reverse the pieces in the jig and then cut the second side. Trust me, there were lots of steps to make these stupid things.

Once out of the duplicator and rough sanded to shape and eliminate the router marks I made this jig to hold the little buggers. Here I made a template that matched the mortise on the corner of the spire to transfer the carving marks to the crockets to keep them uniform and eliminate  much carving when installed.

Once the area where it sweeps into the corner of the spire was done, I was able to flip the jig on it’s side, carve the details of the ball shape, flip it over and carve the other side as well as the area under the “hooded” area. Again,, I had to do this process how many times for each? Turned out , even though it’s oak, I was able to knock these out in 3 minutes each. OK,, not too bad but I’m still not done with them as they have to be installed and do the final carving. Believe it or not, each crocket had it’s OWN LOCATION on each spire! These guys know how to drive me nuts.

Here they are all glued into position awaiting final carving /sanding to get them to blend perfectly. Well, the two on the left are done, but still, how many more to go?

Not finished here but it shows how they have to appear to sweep up out of the corner of the spire.


Finally they are done. Now call them and get them out of here as I’m tired of looking at them!


2011 in review

a happy new year to all our readers ! this was a great year, and as i love these stats provided from wordpress (thank you wordpress :-)), i like to share them. they did a miracle to make the stats fun to look ! enjoy !

The WordPress.com stats helper monkeys prepared a 2011 annual report for this blog.

Here’s an excerpt:

The concert hall at the Syndey Opera House holds 2,700 people. This blog was viewed about 42,000 times in 2011. If it were a concert at Sydney Opera House, it would take about 16 sold-out performances for that many people to see it.

Click here to see the complete report.